|
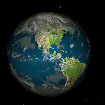
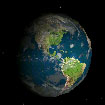
The view from just off Io
In the normal field of view, planets are displayed like
stars, which is how they appear to us from the Earth's
surface. As you get closer to a planet (by either zooming up
to them or by locating yourself close to them) you begin to
see the disc image and any phase information.
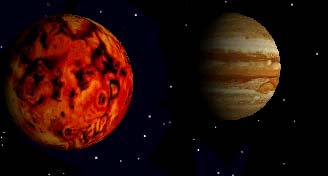
Starry Night depicts the planets using the latest images
from NASA and other space agencies, however, because many
planets are constantly evolving, these images can quickly
become out of date. For instance, the appearance of the gas
giants is continuously changing. The Great Red Spot of
Jupiter drifts a little in unpredictable ways, making a
precise synchronization between Starry Night and observation
from Earth difficult. In addition, surface features of some
planets (such as volcanically active planets like Io) change
rapidly. We here at Sienna will do our best to keep our
planet images as current as possible, and will make
available any updated planet maps.
Unfortunately, we Earthlings have not yet been able to
fully image all of the objects in our solar system. Where
little or no data is available, Starry Night uses the
time-honored tradition of deploying space artists to create
the surfaces of distant worlds (for example: Pluto, Charon,
and Saturn's moon Phoebe).
Read the Planet Palette chapter
for information on how to locate planets in the night sky,
how to turn their orbits on and how to track their local and
celestial paths.
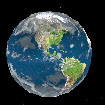
Planets can be toggled on and off via the Display menu or
palette. Since the Earth is also a planet, it will toggle on
and off along with the others.
Planet Options
To change the way in which planets are shown in Starry
Night open the Options dialog by selecting "Options..." from
the Settings menu, then pick "Planets" from the popup menu.
Alternatively, click the options
button for Planets in the Display palette.
Show Planets: When this box is checked, the Sun,
the planets, and the moons are shown. To make them
invisible, uncheck this box.
Less Detail While Scrolling: To improve
performance, this box can be checked so that planet surface
detail is lowered during scrolling.
Labels: This check box allows you to adjust the
way planet labels are displayed. You can also adjust the
font and font size of the planet names using the popup
menus.
Show Names: Pressing this radio button will
display the names of planets.
Show Symbols: When activated, the symbols used to
represent planet names are turned on.
Show Both: When activated, this radio button will
display both planet names and symbols.
Rendered Surface: This checkbox toggles the
detailed planet maps on and off. The status of this checkbox
will also affect the number of phase options are available
in the Phases popup.
Show Atmosphere: This
checkbox toggles on and off planet surface maps of certain
objects, such as the Sun, Venus, and Earth. When checked,
the object will be shown with atmospheric features such as
clouds, or in the Sun's case, the Sun will appear as it does
when viewing through a hydrogen-alpha filter.
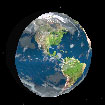
Phases: This popup menu lets you choose how the
phase of a planet is displayed. (Phase information is how
the planet is illuminated by the Sun.) For increased
performance on slower machines, you may want to try
switching to views without phases, or with sharp phases.
Note: if the Rendered Surfaces option is unchecked, there
will be fewer phase options available.
None (Good): shows the planet with no phase information
or spherical shading.
None (Best): shows the planet with no phase information,
but with spherical shading.
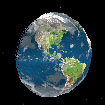
Sharp (good): depicts the terminator (the area between
day and night) as a sharp line, without a gradient.
Gradual (good): uses cruder shading techniques to depict
the terminator's gradient.
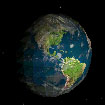
Gradual (better): uses geometric shading techniques to
depict the terminator's gradient.
Gradual (best): uses advanced shading techniques to
depict the terminator's gradient.
Show Cast Shadows: This checkbox toggles on and
off the shadows planets cast on other planets, as well as
activating the Earth/Moon target option.
Earth/Moon Targets: This checkbox toggles on and
off targets of the Earth's and Moon's shadows whenever the
two bodies are appropriately aligned with the Sun. The two
circles of this target represent the limits of the umbra and
the penumbra projected out at the Earth/Moon distance. For
example, this feature is useful when watching a solar
eclipse from the Moon, as one can see the Moon's target
approaching the Earth before it actually casts on the
Earth.
- Note: You'll probably want to
zoom up to see the penumbra of the Moon's shadow, since
it is very small. This is why total eclipses of the Sun
are so rare at any given point on the Earth, and why they
only last for such a short time.
Guides: Checking the Planet guides box allows you
to select among several graphical displays of planetary
information, including Surface grids, a Meridian line, the
Equator, Pole sticks, and Grid numbers.
Orbit Brightness: You can control the brightness
at which all orbits are displayed using the slider supplied.
Useful to get just the right 'look' to a picture.
Enhanced Orbits: Starry Night allows you to draw
the orbits of the planets and comets with extreme accuracy.
However, enhanced orbits do take longer to draw, so you may
wish to turn off this feature on slower machines
Show Ascending Nodes: The ascending node of the
orbit (the point at which the planet crosses moving north
through the ecliptic plane), is marked with a solid wedge.
If you want to show this solid wedge, check this box.
Show Descending Nodes: The descending node of the
orbit (the point at which the planet crosses down through
the ecliptic plane), is marked with a hollow wedge. If you
want to show this hollow wedge, check this box.
Show Point of Closest Approach: The point at which
the orbit comes closest to the parent body (the pericenter),
is marked with a little stick.
Within this folder you can adjust how planet paths are
displayed. You can also instruct Starry Night to display a
circular marker or date at intervals on the orbit. This
feature is very handy if, for example, you are plotting the
celestial path of an object and want to know where it will
be in the sky and on what dates.
Hide Paths While Scrolling: To improve
performance, you can check this box so that planet paths are
turned off while scrolling.
Mark Every __ Steps: This box allows you to enter
a number (from 1 to 99) determining how many time steps are
taken between circular markers and/or date displays, if one
or both are selected. The default setting is 10 steps.
Circular Marker: If checked, a small circular
marker will be displayed on the path, at the step interval
(determined above).
Date: If checked, the date will be displayed on
the path, at the step interval determined above.
Set Color: By clicking on these buttons, you can
select a new color for the celestial and local paths.
|

